
Designed with user-friendliness in mind, WooCommerce offers an intuitive interface to add products, be they physical, digital, or even subscription-based. By mastering this fundamental skill, you’re taking a significant step toward populating your online store and appealing to a wider customer base.
However, it might be difficult to manually add products to your site after opening an online store. Also, more than simply adding products is required; the finer details make a difference. This includes optimizing your product titles, writing compelling descriptions, and incorporating high-quality images.
If you effectively utilize these elements, you enrich the user experience and boost your store’s SEO ranking, thereby driving more organic traffic to your online business.
That being said, understanding how to add products in WooCommerce is indispensable. Stay with us as we enter a step-by-step guide that simplifies the process and shares valuable insights to make your products irresistible to potential buyers.
9 Different Types of WooCommerce Products

Before learning how to add products in WooCommerce you need to learn about multiple types of products of WooCommerce. There are different customizations available for each of them.
i. Simple products
These are the most straightforward product types. Simple products are single items with no variations. They can be physical goods like books or digital files like music. You can also enable shipping options and tax settings for these items.
ii. Grouped products
Imagine you’re selling a dishware set; a grouped product allows you to feature each piece separately within the main product. Customers can buy individual components or the entire set, offering more purchasing flexibility.
iii. Variable products
With variable products, you can offer multiple variations of a single item, such as different sizes or colors. Each variation can have its own price, SKU, weight, and inventory settings, enabling your customers a more tailored shopping experience.
iv. Downloadable products
These products offer an automatic download upon purchase, ideal for selling digital goods. You can set download limits, expiration dates, and other features to manage the distribution of your digital assets.
v. Virtual products
These intangible products don’t require shipping, making them perfect for consultancy, reservations, or digital services. You won’t need to worry about shipping settings for these offerings.
vi. External/Affiliate products
If you are an affiliate marketer or want to list a product you don’t sell directly, this option allows you to link to an external site for purchase. You can set up your own price and description, but the transaction occurs outside your WooCommerce platform.
vii. Subscription products
These products or services require recurring payments. Subscriptions can renew daily, weekly, monthly, or yearly. You can also offer free trials or set up sign-up fees. This is particularly useful for memberships, courses, or any other form of ongoing service.
viii. Composite products
If you offer customizable products of multiple components—like a build-your-own computer—composite products give customers the flexibility to pick and choose each part. Each component can even be a simple or variable product, adding flexibility.
ix. Bookable products
Best suited for businesses offering appointments, rentals, or services based on time, this type lets you set availability, block out times, and even define specific cost parameters based on the time or date chosen.
How to Add Products in WooCommerce in 6 Steps Manually
Whoever is wondering about how to add different products in WooCommerce, they should watch out this tutorial. However, the editing process requires some difficulties. Let’s get started!
Step-1: Add New Products
You can’t add any product if you don’t have WooCommerce in the first place. So, after you log in to your WordPress, make sure that you download WooCommerce. Setting up WooCommerce is easy; you only have to follow some initial steps.
Now, on the left side bar, hover on Products, then click on Add New. This will take you to the product editing page.
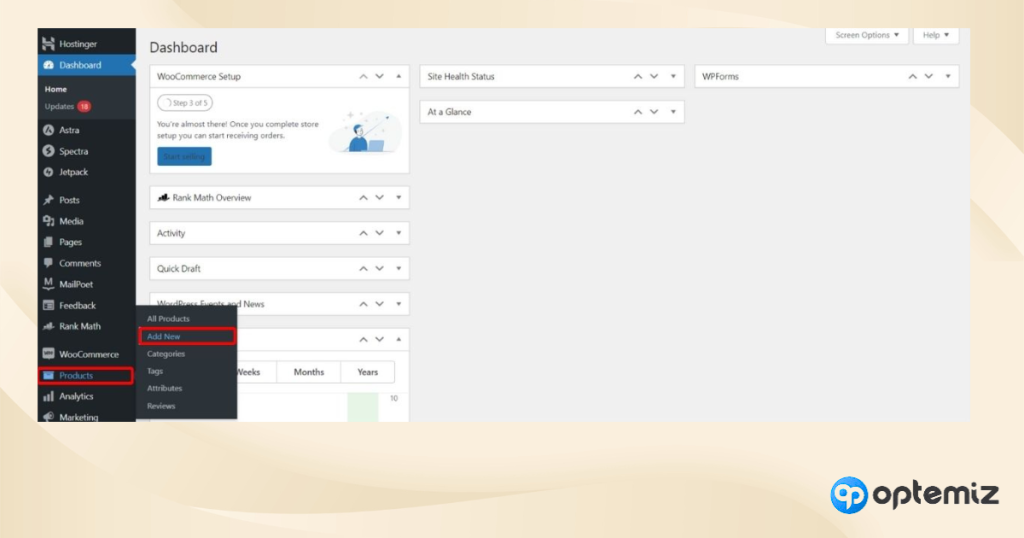
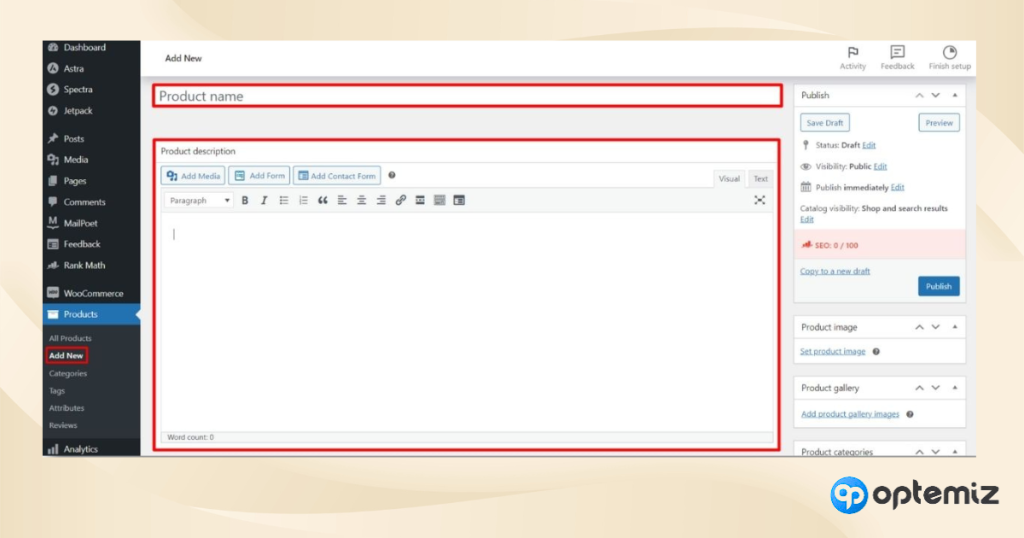
In this page add the Name of your product, also there is a Product Description box that will display the overall explanation of the product.
Step-2: Insert product data
Next, scroll down, and you will find the Product data section.
Generals
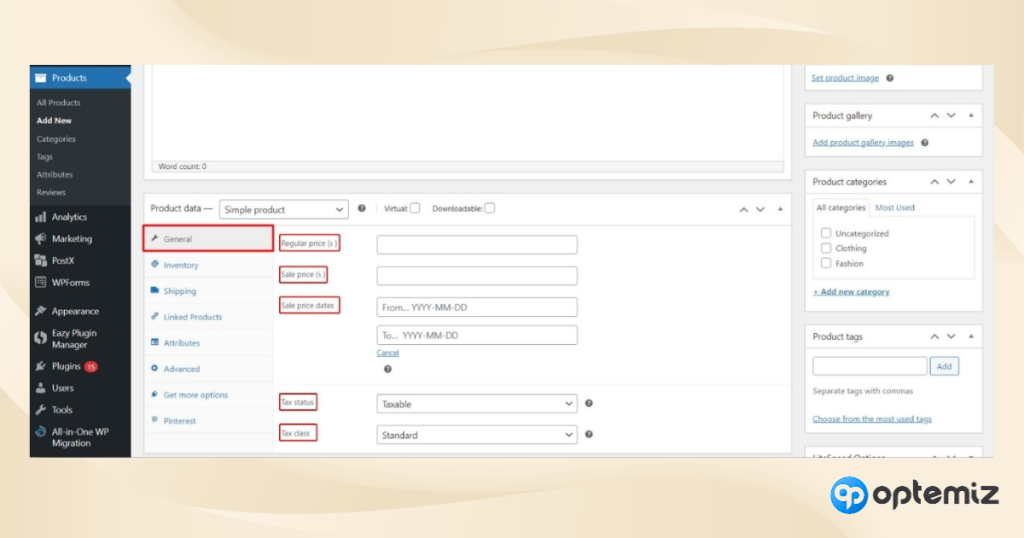
- Regular price: This is the standard price at which you sell the product. It serves as the baseline figure that customers expect to pay under normal circumstances.
- Sale price: If you intend to offer a discount on your product for a limited time or permanently, you can specify this lower price in the Sale Price field. This will override the regular price for as long as the sale price is active.
- Sale price dates: These are the start and end dates for any sale you run. By setting these dates, WooCommerce will automatically apply the sale price between them and revert back to the regular price once the end date has passed.
You can edit the Tax options as well,
- Tax status: This is likely a typo; the correct term is Tax Status. The Tax Status field in WooCommerce determines how a product is taxed. The options usually include Taxable, Shipping Only, and None. Choosing Taxable means the product will have tax calculated based on the customer’s location and your store settings.
- Text class: This option allows you to categorize your product into specific tax rate classes defined in your WooCommerce settings.
Inventory
In the Inventory section, edit the options according to your needs.
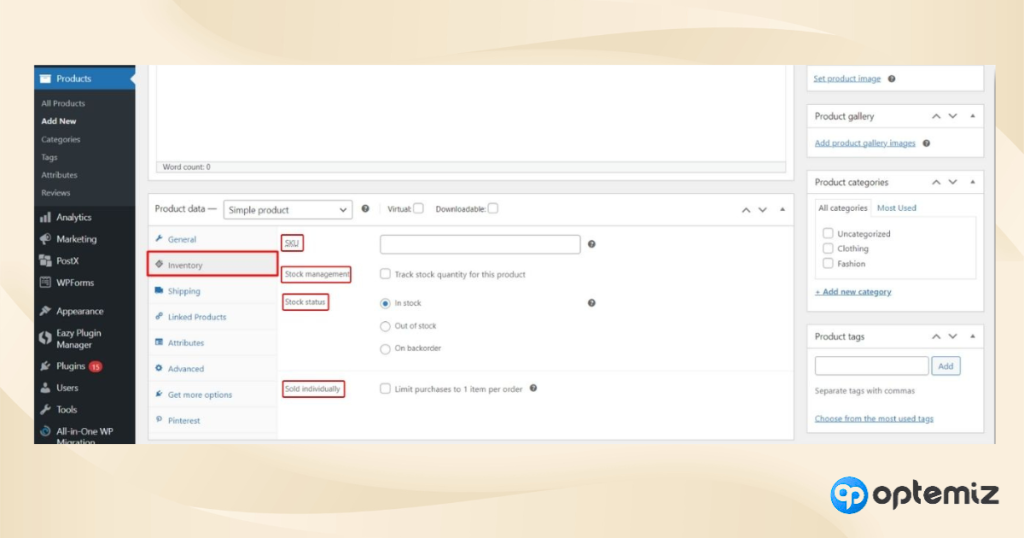
Some important options you can check like,
- SKU: SKU is a unique alphanumeric identifier that you assign to each product or product variation. One example can be SP23-BLK-M-COT-J
- SP23 – Represents the 2023 Spring Collection
- BLK – Stands for the color black
- M – Indicates a medium size
- COT – Short for cotton material
- T – Denotes that it’s a t-shirt
- Stock management: This feature lets you track your inventory levels. When enabled, you can input the number of items in stock for a particular product. You can showcase that you have 1 or more products in your stock before it finishes.
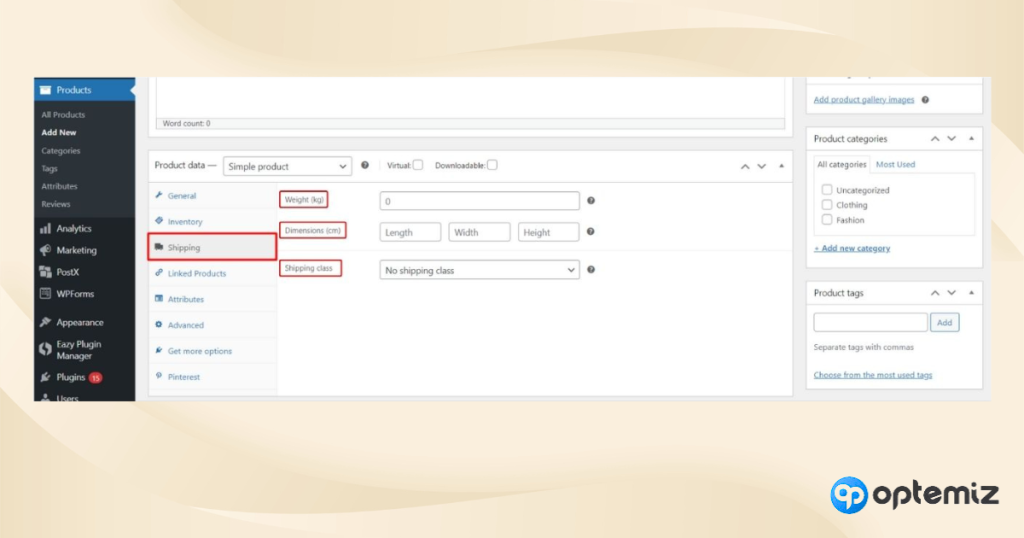
Shipping
This section determines the weights and dimensions of the product. A bit more detailed information for the curious bits!
Linked Products
In the linked product section, you can recommend different products. You need multiple products to use this option.
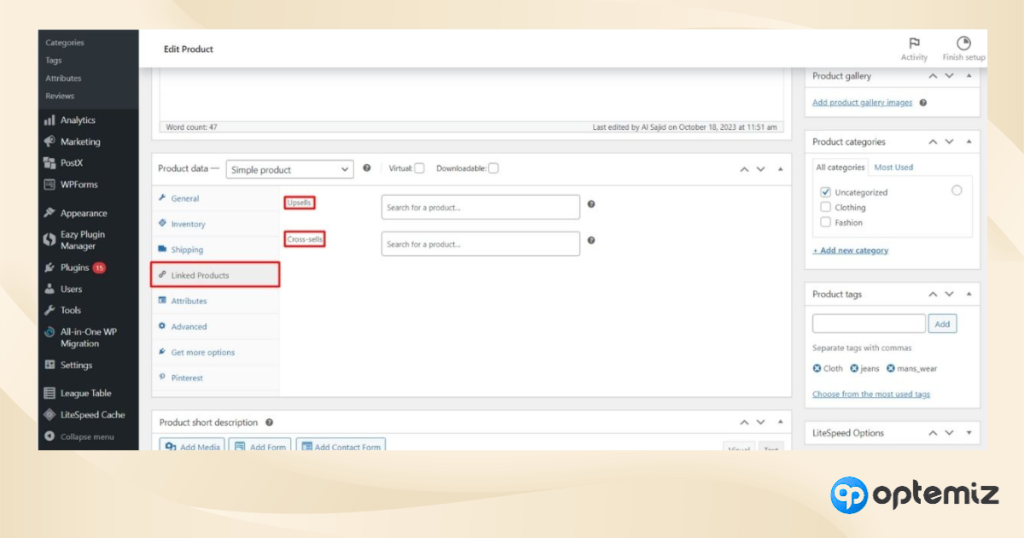
There are 2 options in this section,
- Upsells: Upselling encourages customers to purchase a higher-end product than the one they are currently considering. For example, an upsell would showcase a more advanced, higher-priced model with better features if a customer is looking at a basic laptop model.
- Cross-sells: Cross-selling invites customers to buy related or complementary items to the product they are currently viewing or have added to their cart. For instance, if a customer is buying a smartphone, cross-selling can be used to recommend accessories like a phone case or screen protector.
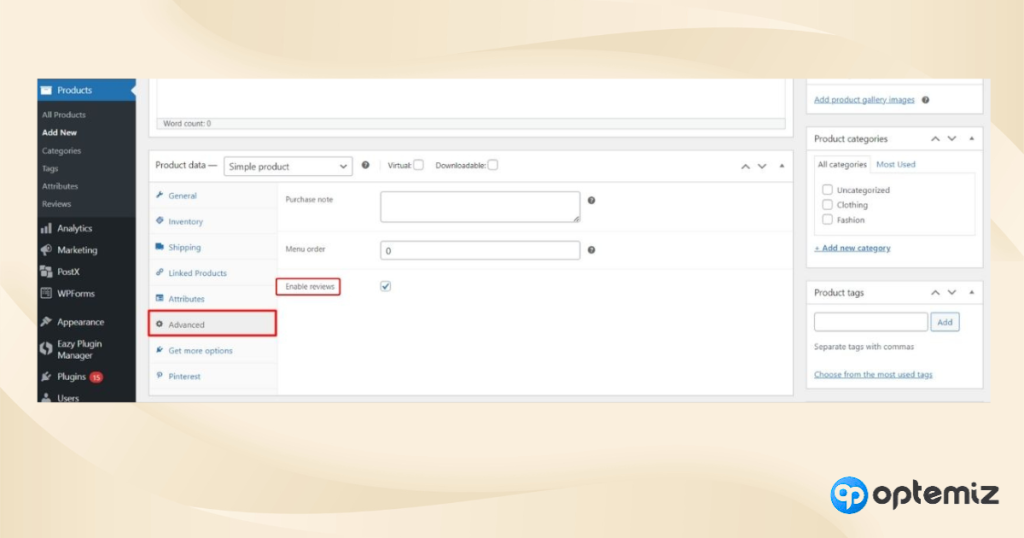
Advanced
With the help of the advanced section, you can enable your products for Reviews and other Purchase Notes for customers.
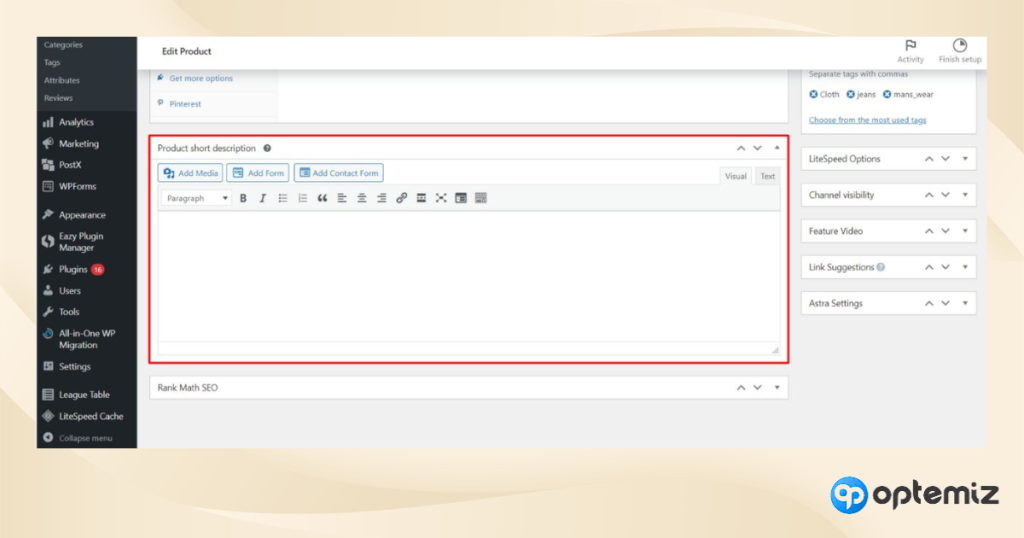
Step-3: Write a short product description
If you want, you can add another short description to your product. This short description increases the chances of grabbing the customers attention really well.
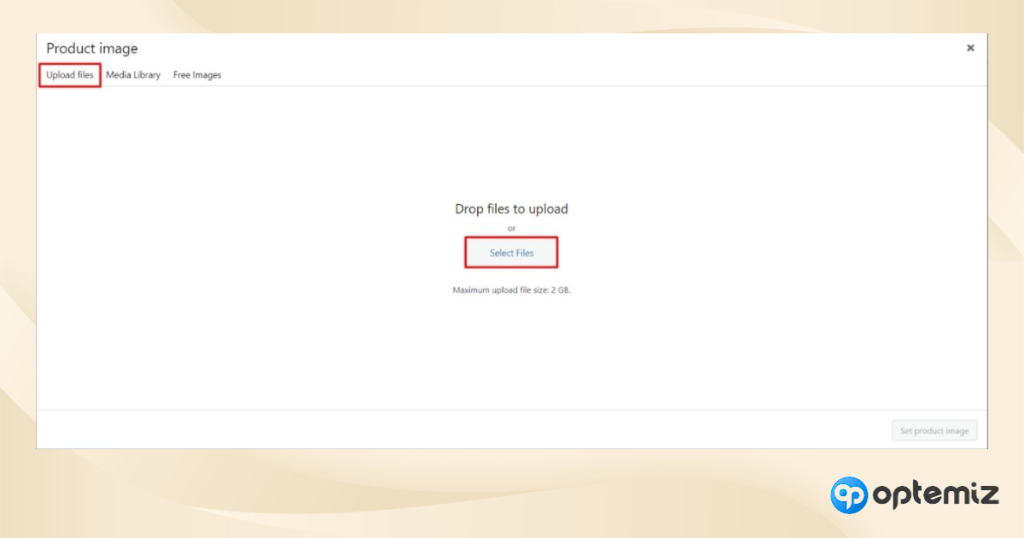
Step-4: Add images for your product
Add an image to your product to make it more visually appealing.
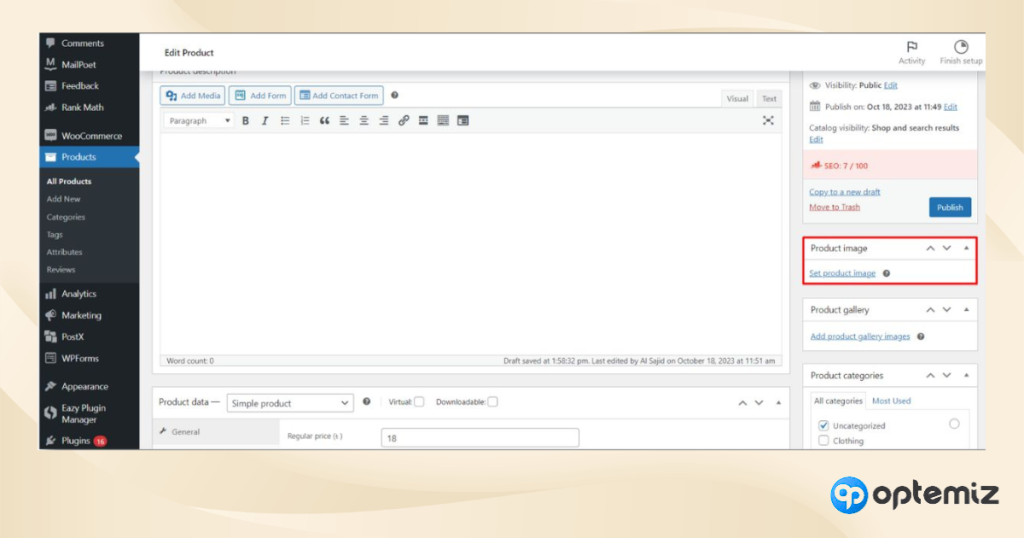
Click on Set product image, and add an image.
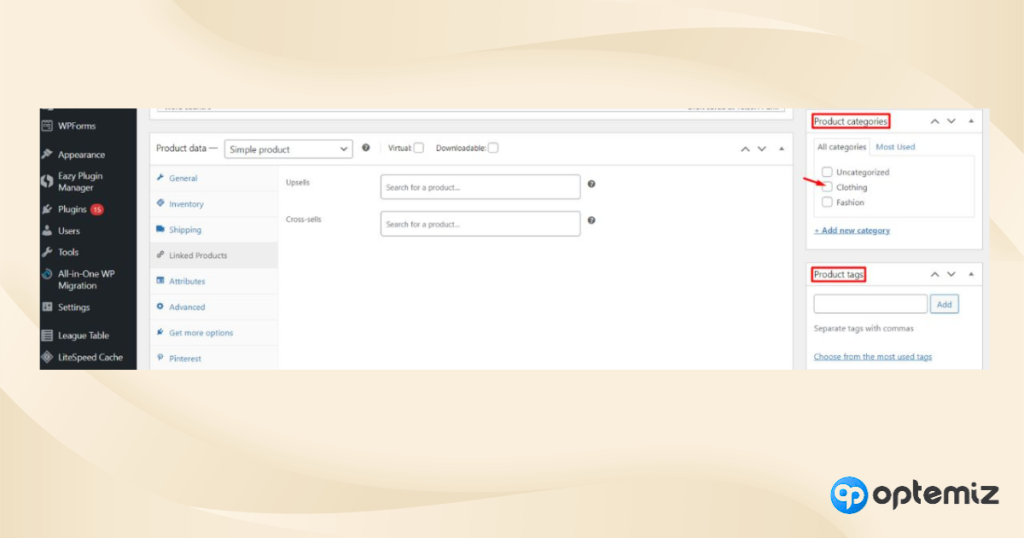
Step-5: Insert product tags and categories
You must apply some tags for your product, which helps customers search for it faster.
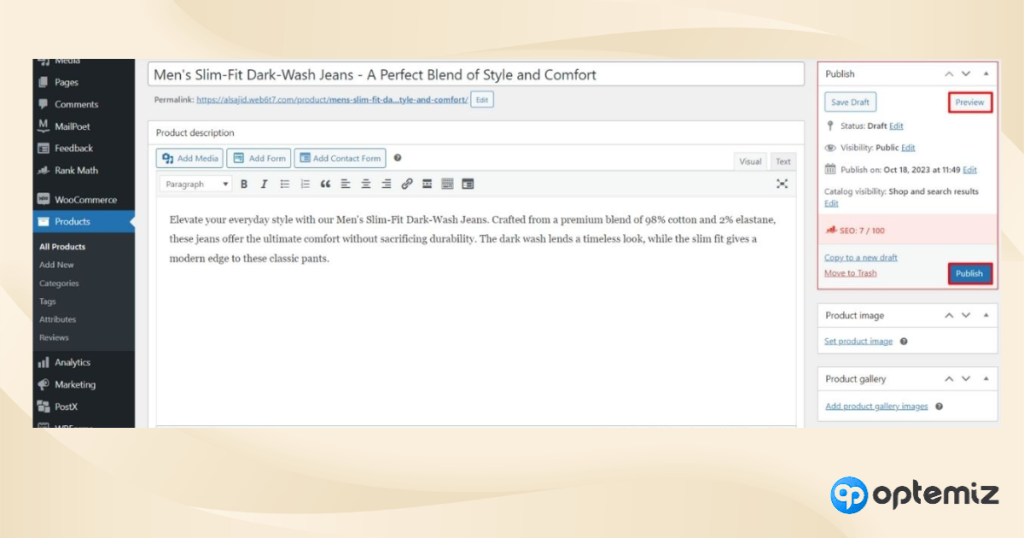
Step-6: Publish your product
Finally, check all the above processes and publish the product. if you need to see your product’s appearance, click Preview to check before publishing.
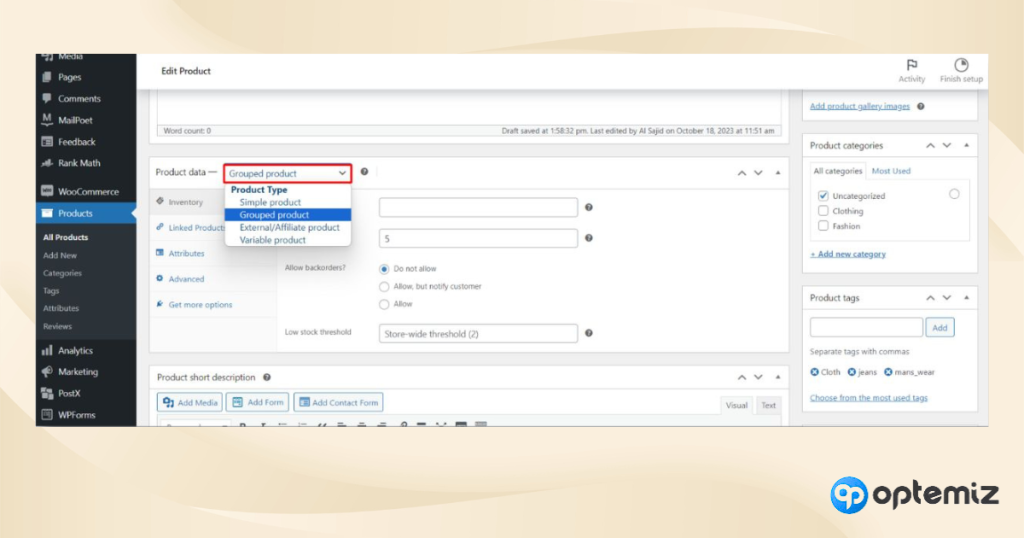
How to Add Multiple Products in WooCommerce?
To add multiple products in WooCommerce, all you have to do is select Grouped products from the drop-down menu bar. It will give you the access to add multiple products, and the rest of the process is similar to adding a single product.
Final Verdict
And, that’s how you can add single and multiple products easily. One thing to keep notice of is that try to add as much information as possible before publishing the final product. You can always draft the product for later edits if you are not ready to publish.
Also, you can select draft or pending review from the status field for more detailed observation. Remember, adding a product is just like editing an article in WordPress! Pretty easy.
Having walked you through the comprehensive steps on how to add products in WooCommerce, it’s clear that the platform offers a perfect and user-friendly interface for online store management.
Have a good day!